Creating an App
An app in Ductape represents a third-party or internal API that your product interacts with. Each app has its own environments, base URLs, actions (endpoints), and variables.
Step 1: Click the "+ New" Button
In the top-right corner of the header — to the right of the dark mode toggle and to the left of the profile dropdown — click the + New button.
A dropdown will appear listing all the assets you can create.
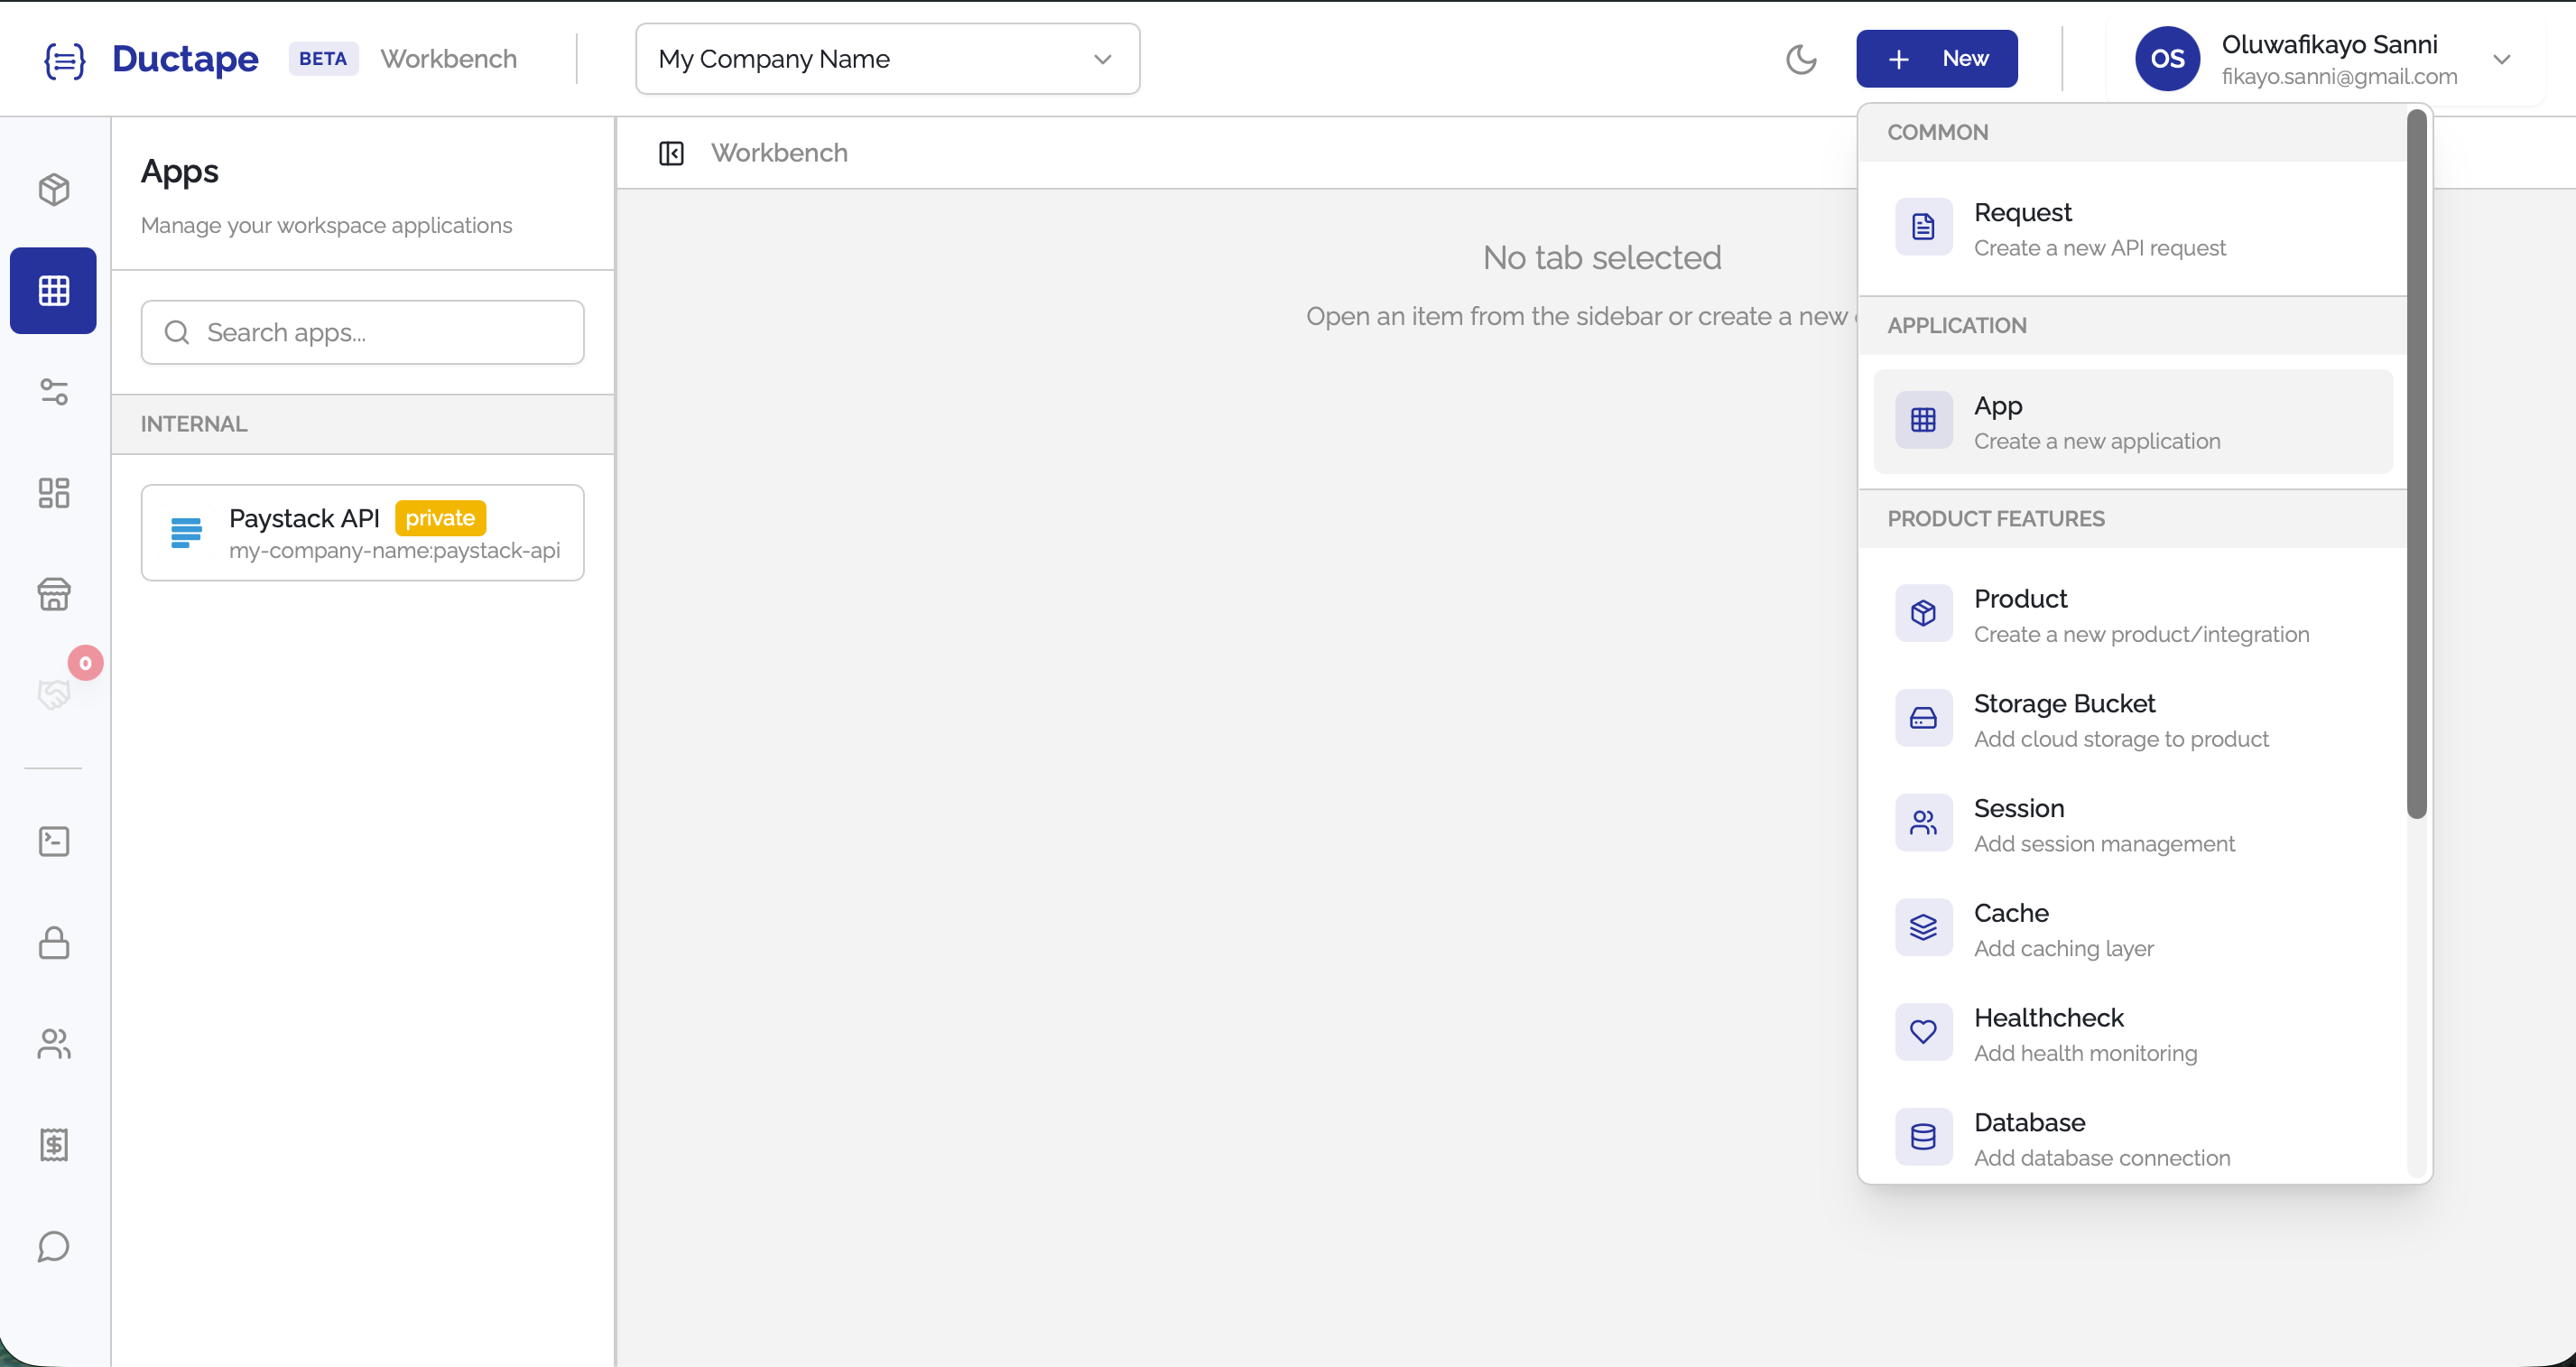
Step 2: Select "Create an App"
From the dropdown, click Create an App.
This will open a new App tab in the main content area.
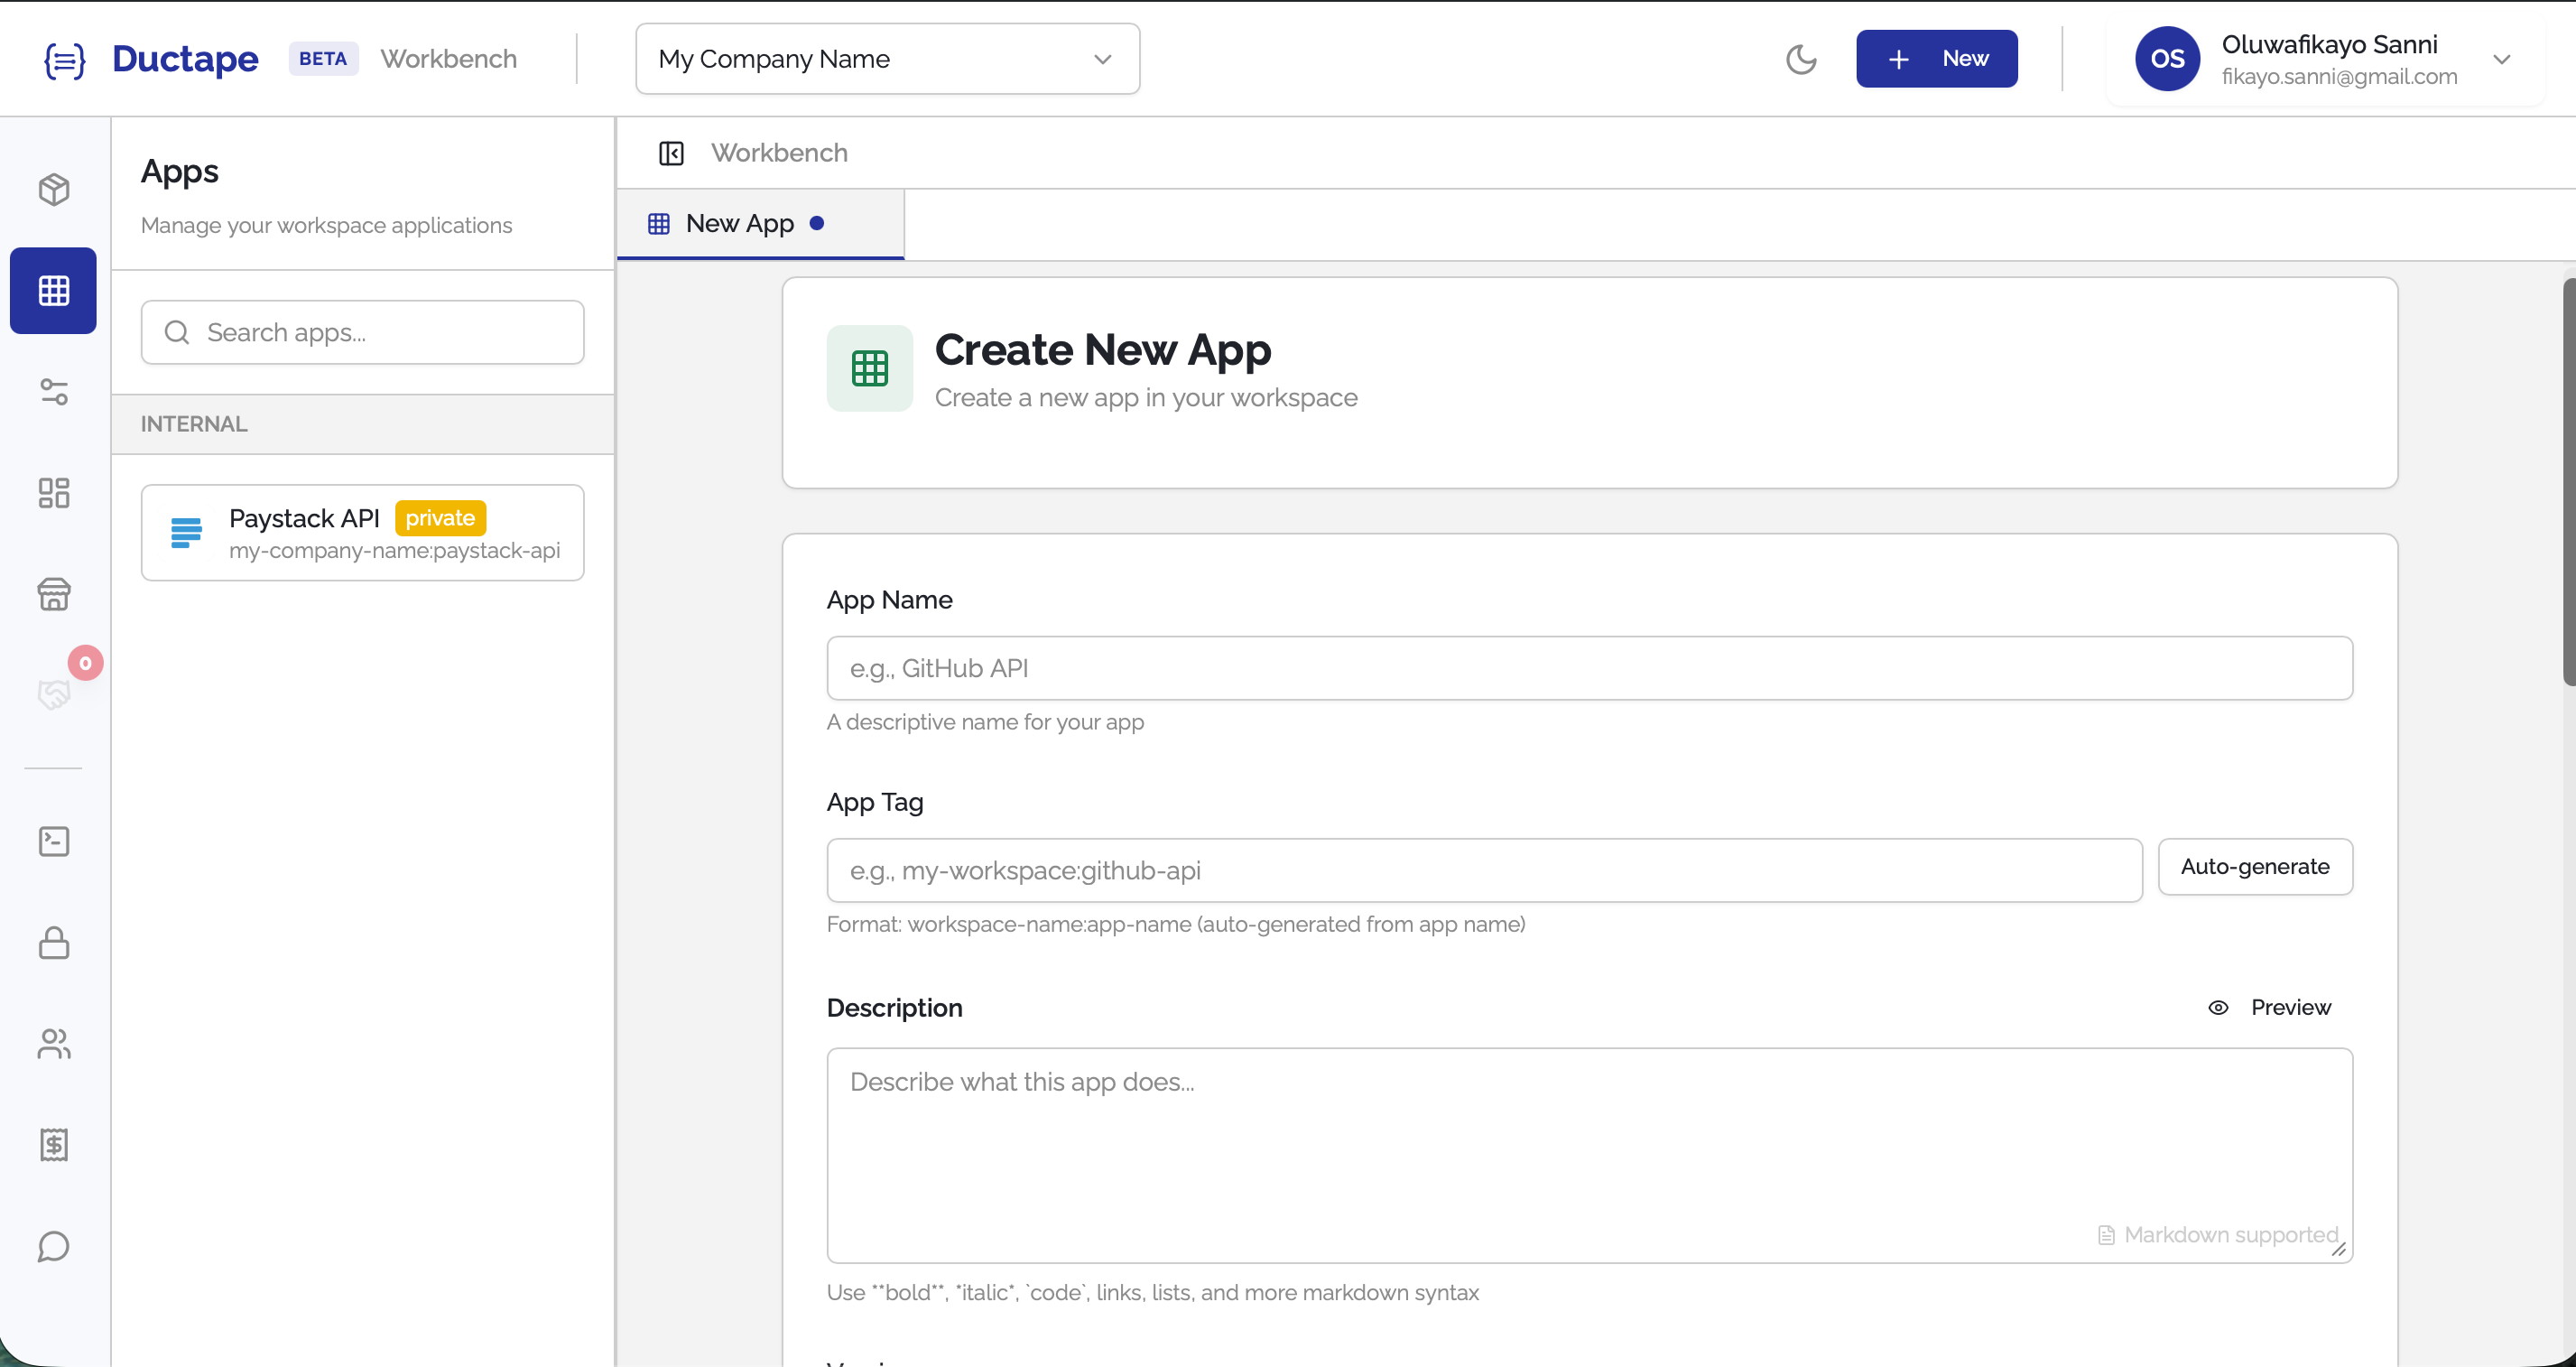
Step 3: Fill in the App Name
Type your App Name in the name field (e.g., Stripe, Internal Auth API).
As you type, Ductape will automatically generate a tag (a URL-safe slug) from the name — for example, stripe or internal-auth-api. You can edit the tag manually if needed.
Note: The app tag must be unique within your workspace and cannot be changed after the app is created.
Step 4: Add a Description (Optional)
Optionally, enter a Description to give context about what external service or API this app represents.
Step 5: Add a Logo (Optional)
You can add a logo to help identify the app:
- Upload: Click the Upload button next to the Logo URL input to select an image file from your computer.
- Paste URL: Copy and paste an existing image URL directly into the Logo URL text input.
![]()
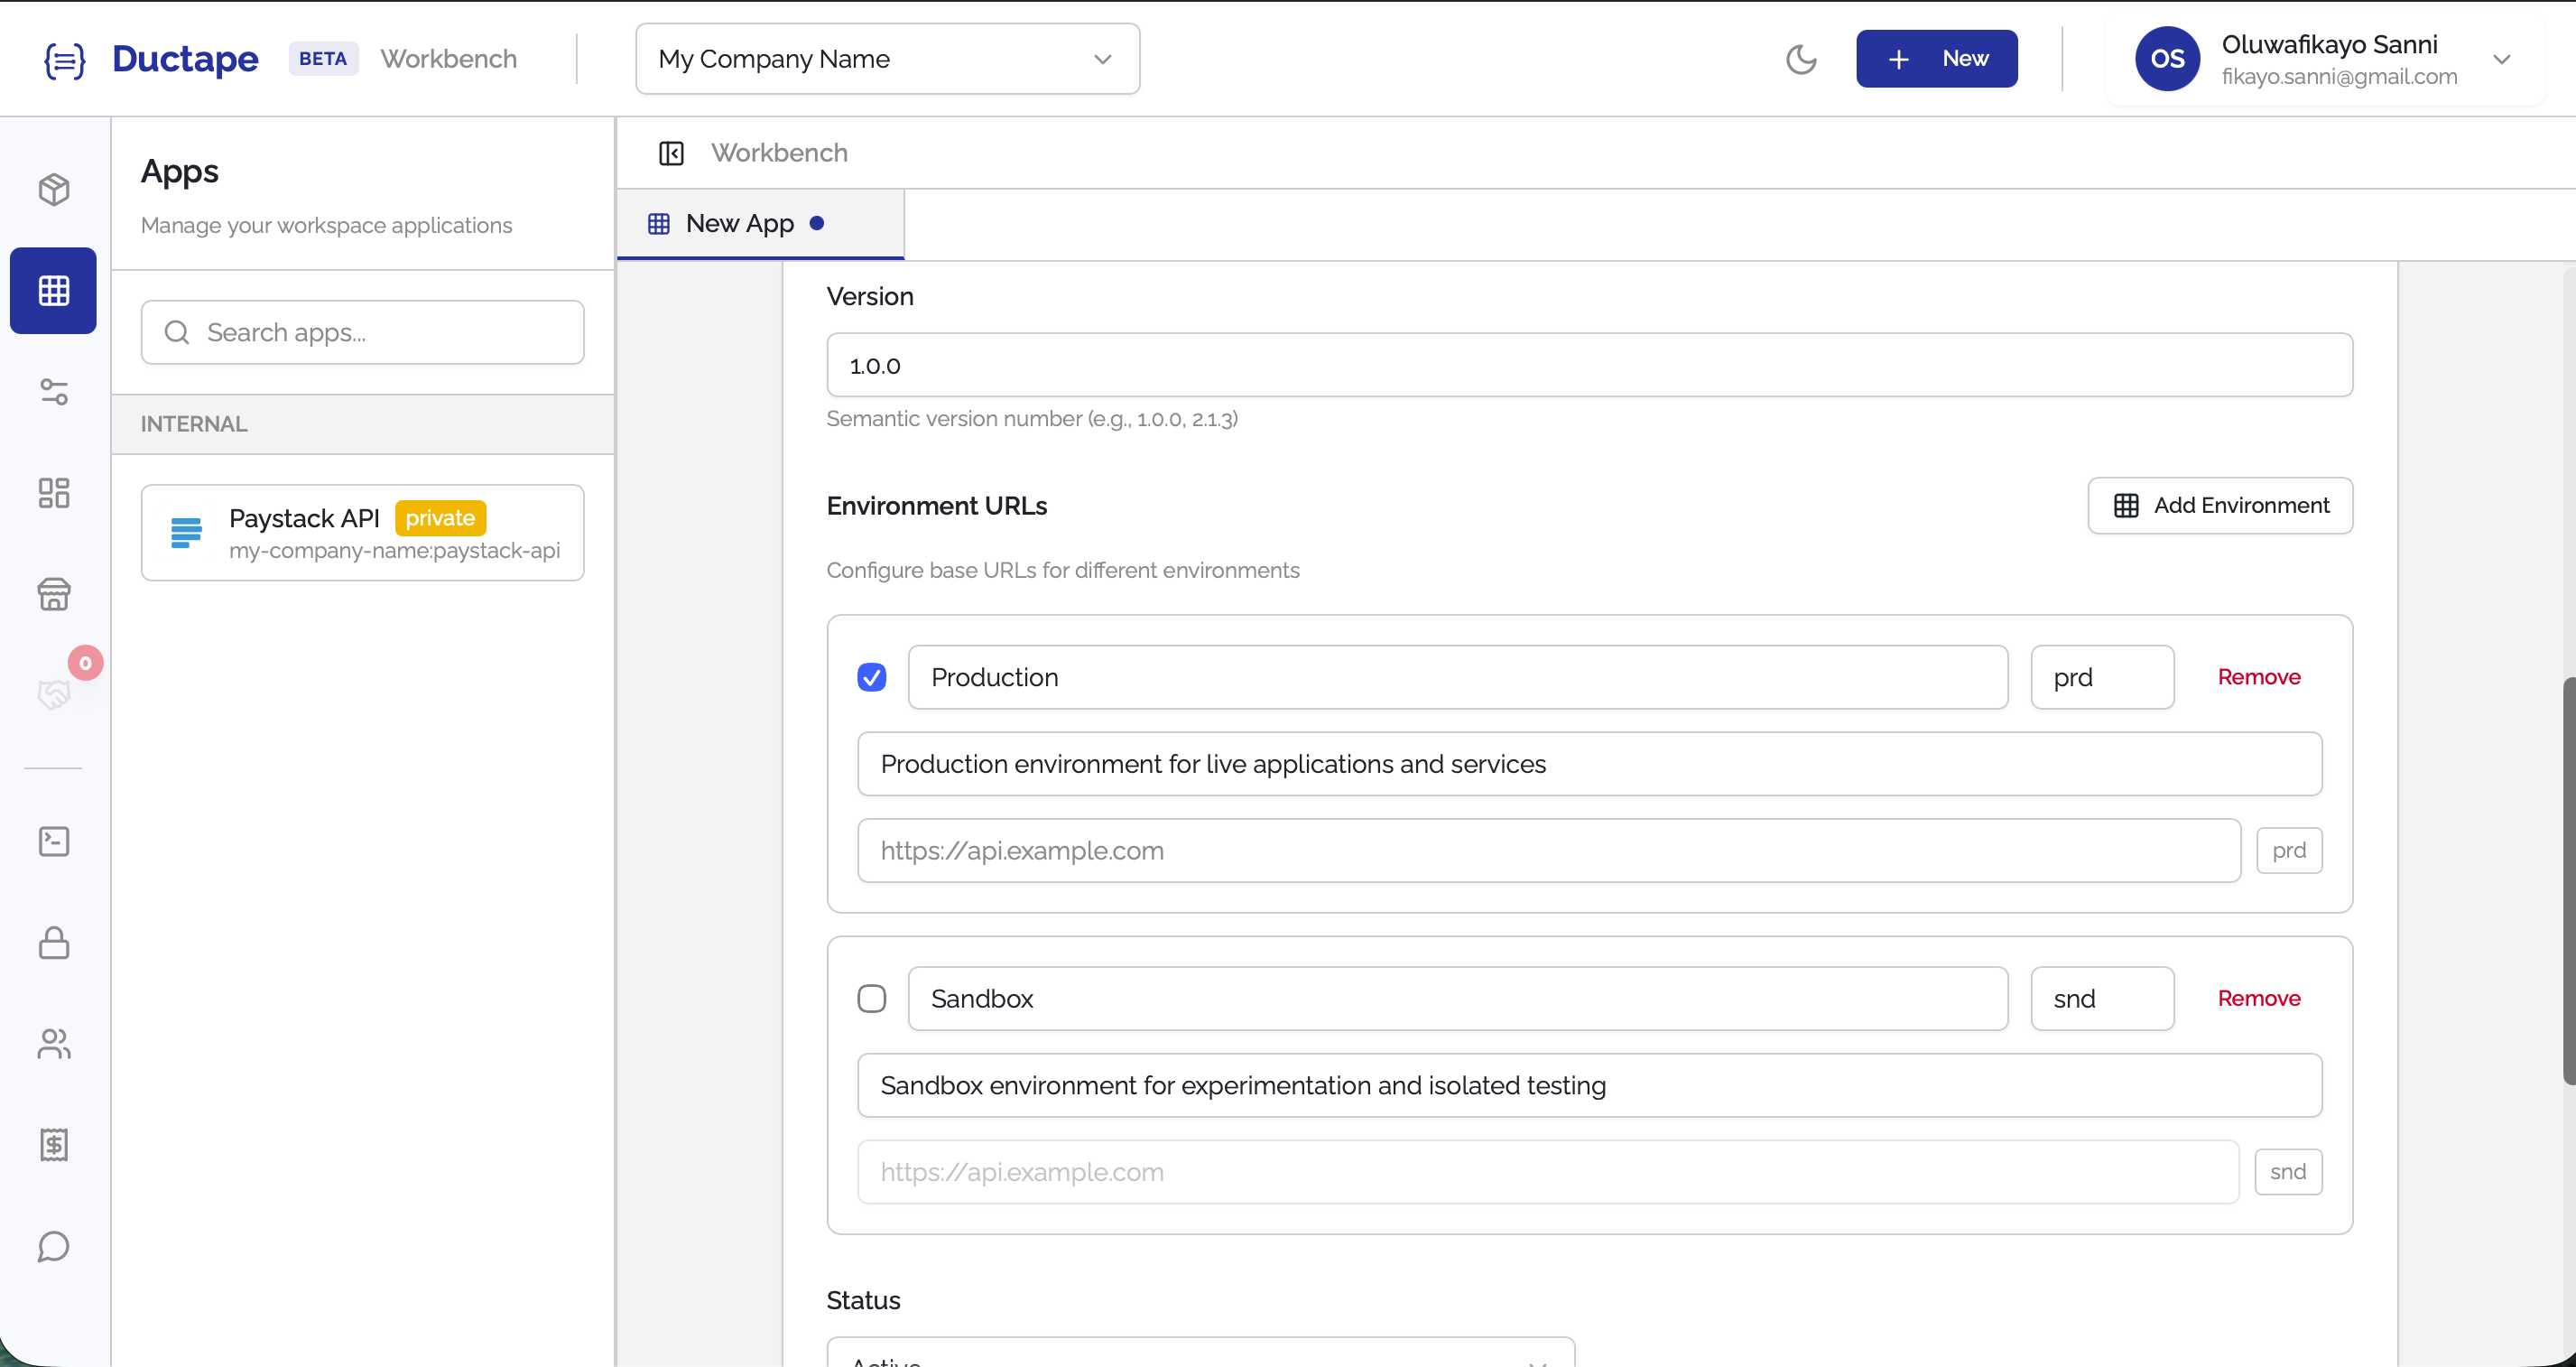
Step 6: Define App Environments and Version
This step is specific to apps. You need to define the environments your app operates in and provide a Base URL for each.
Click + Add Environment and fill in the following for each environment:
| Field | Required | Description |
|---|---|---|
| Environment Name | ✅ | e.g., Production, Sandbox, Staging |
| Slug | ✅ | A short identifier (e.g., prd, snd, stg) |
| Base URL | ✅ | The root URL for this environment's API (e.g., https://api.stripe.com) |
Tip: All action paths (endpoints) you define later will be relative to the base URL you set here per environment. This means you only define the path (e.g.,
/v1/charges) and Ductape will automatically prepend the correct base URL at runtime.
Add as many environments as your app requires.
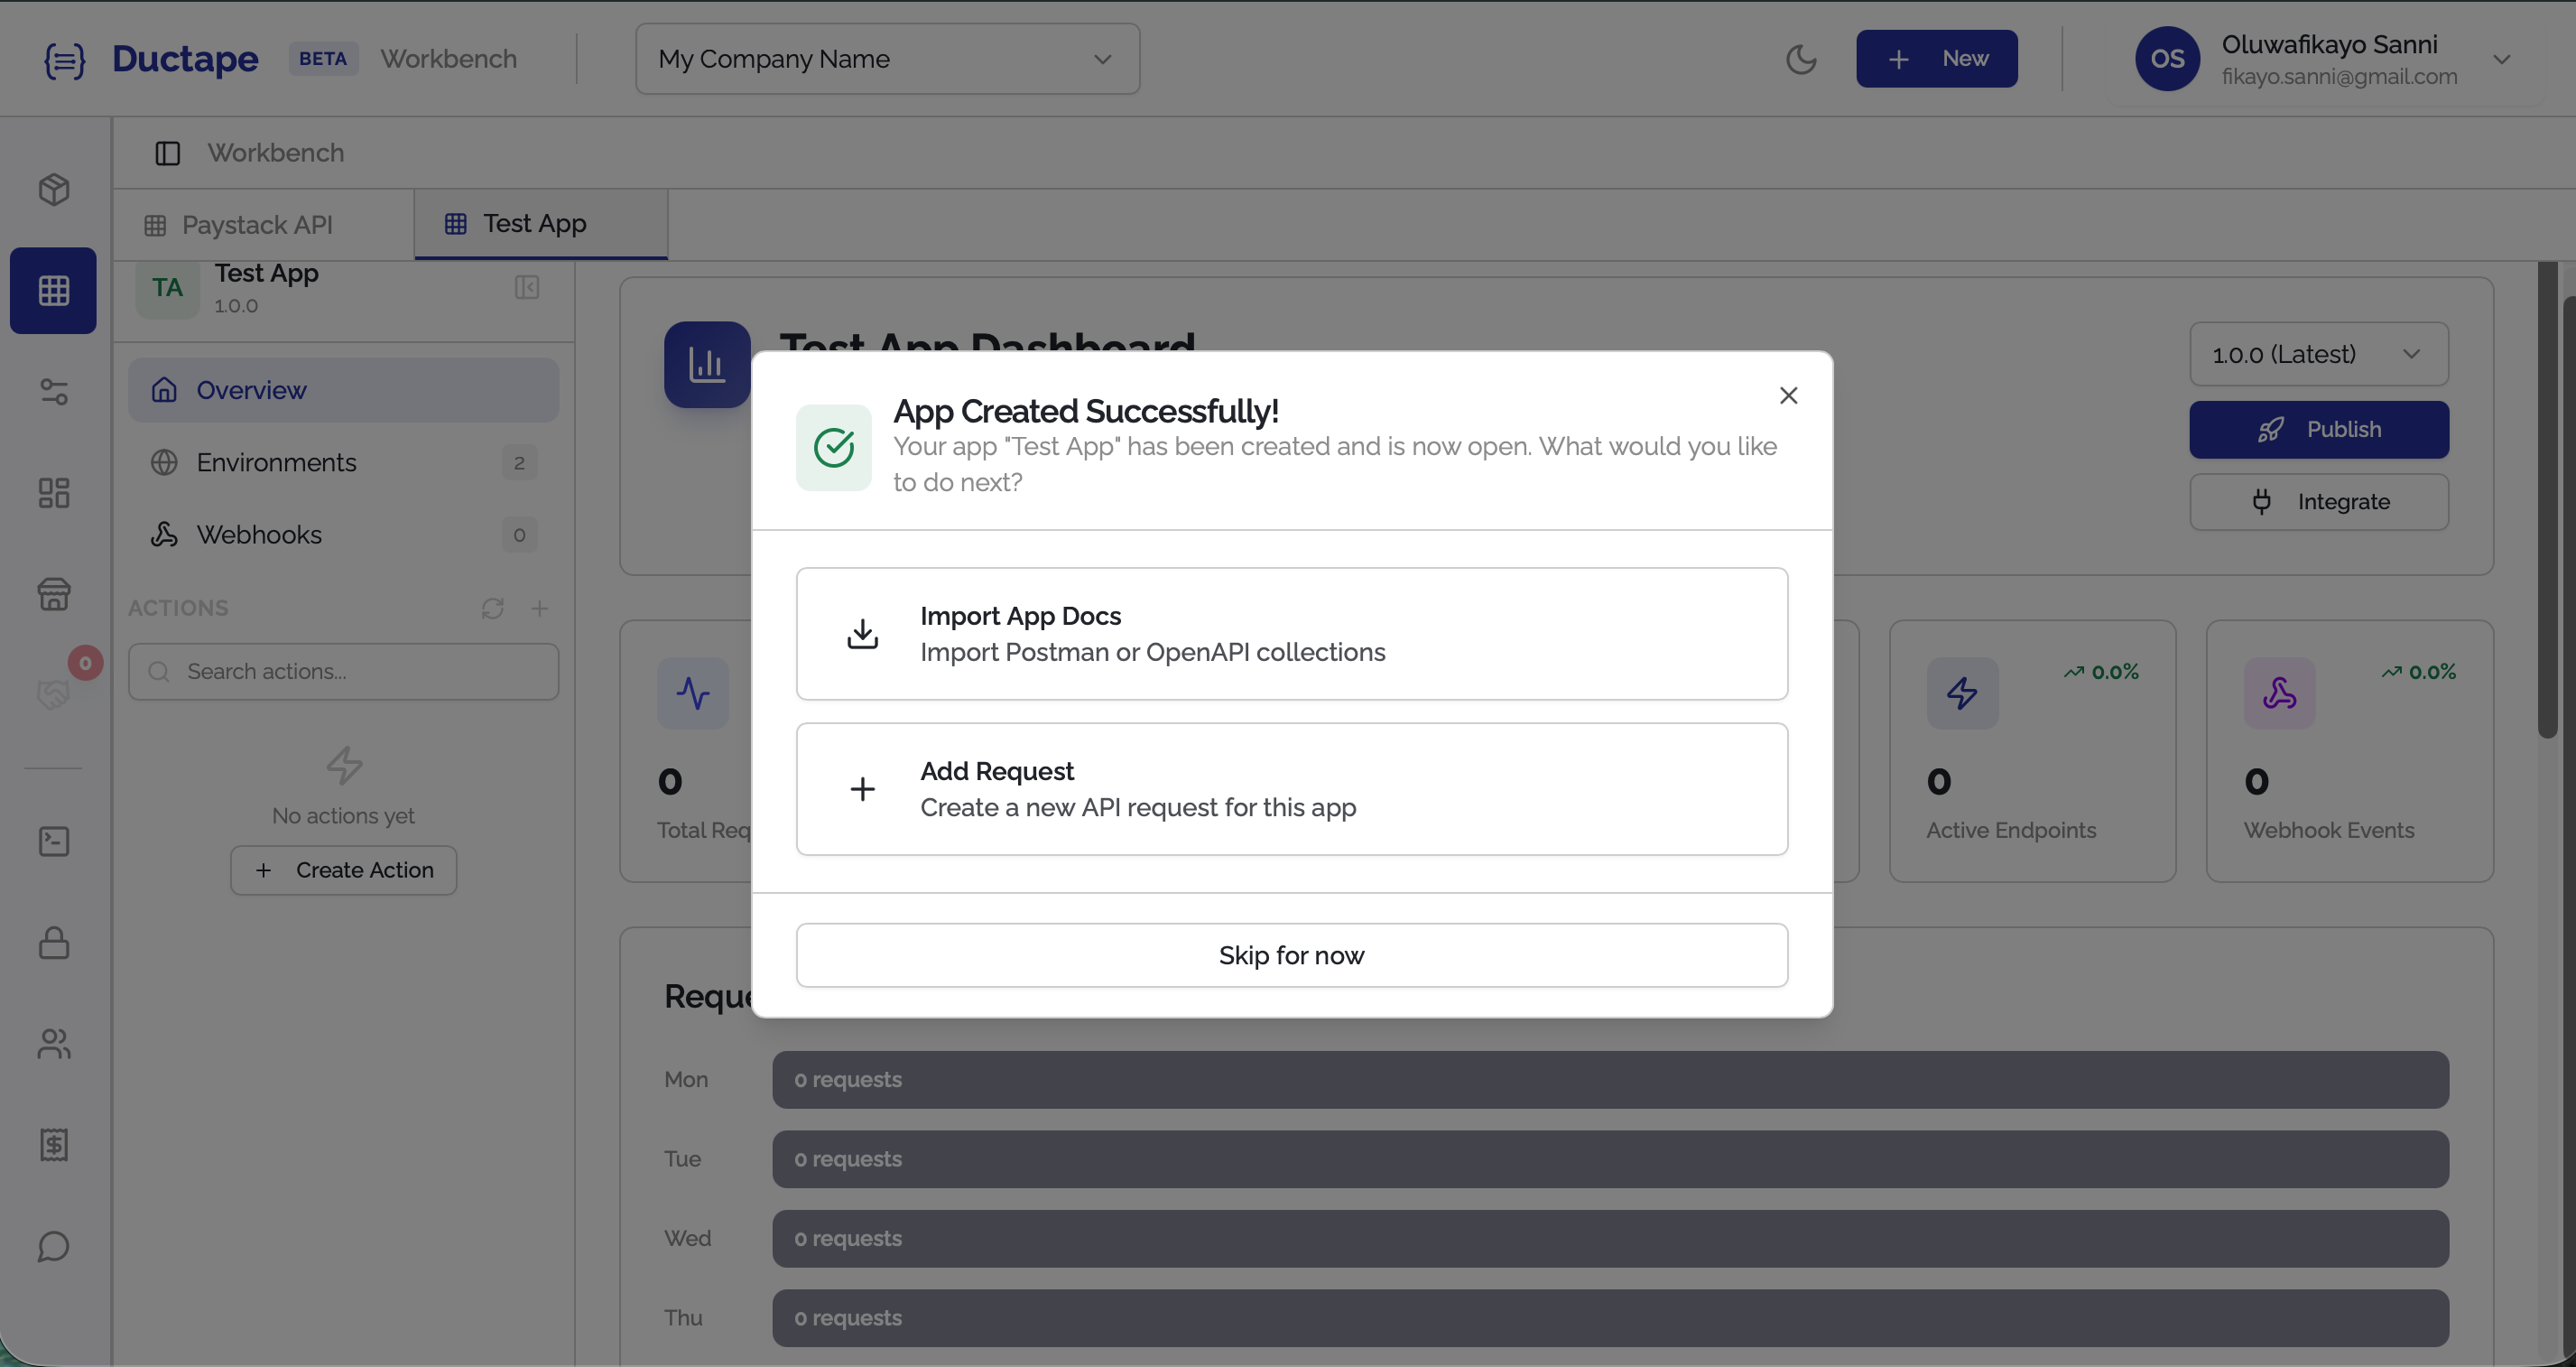
Step 7: Create the App
Once you've filled in the details and defined your environments, click Create App.
Your app will be created and you'll land on the app dashboard, where you can start adding actions (endpoints), variables, authentication, and more.